A Homeowner’s Guide to Photographing Property Damage for Insurance Claims
When disaster strikes—whether it’s a fire, flood, storm, or break-in—documenting the damage with clear and accurate photos is one of the most important steps you can take to protect your insurance Claim. High-quality photos help prove the extent of your losses, support reimbursement, and prevent delays in your recovery.
This step-by-step guide walks you through how to take effective damage photos, with examples, best practices, and common mistakes to avoid.
Step 1: Prioritize Safety First
Before taking any photos, make sure the area is safe to enter.
Avoid unstable structures, exposed wires, broken glass, or hazardous materials.
If the fire department or other officials have restricted access, wait for clearance.
If an area is unsafe, take photos from a distance or use zoom to capture what you can.

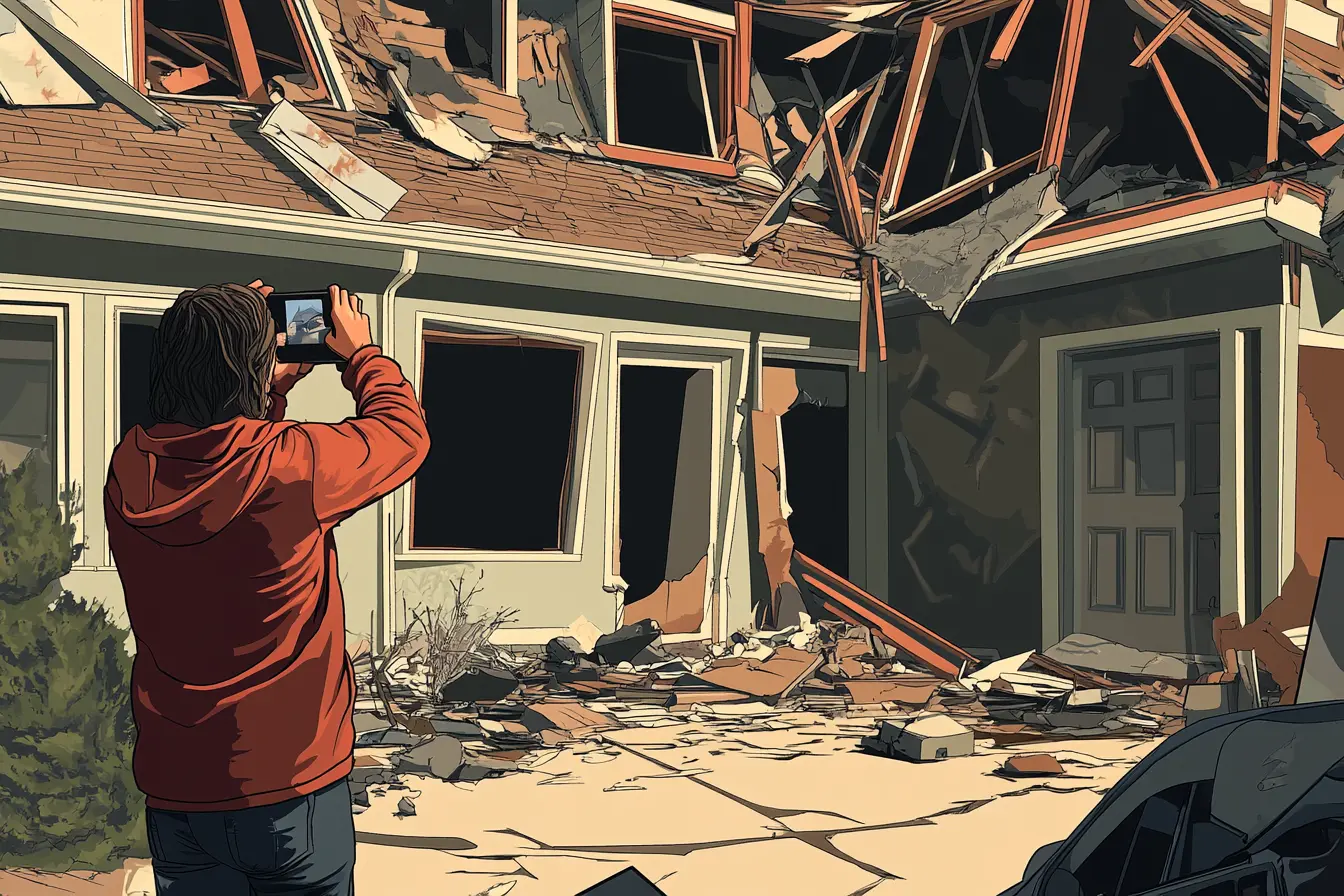
Step 2: Start with Wide Shots to Show the Big Picture
Begin by taking wide-angle photos of each damaged room or area. These images provide context and help show how extensive the damage is.
Examples:
Standing in the doorway to photograph an entire bedroom
Taking a photo from a corner that shows all walls and the Ceiling
Capturing exterior views of the home that show roof damage or broken windows
Take at least one photo from each corner of every affected room, regardless of how severe the damage may seem.
Step 3: Document Each Wall, Floor, and Ceiling Individually
After the wide shots, take closer photos of any visible damage to surfaces.
Examples:
Smoke residue or blistered paint on a wall
Water stains or sagging Drywall on the ceiling
Warped or muddy flooring
Burn marks or charred Trim
Natural light is best. If flash is needed, avoid glare by adjusting your angle.
.webp)
Step 4: Photograph Damaged Items (Personal Property)
Take detailed photos of damaged or destroyed personal belongings. For each item:
Take a close-up of the specific damage
Capture a mid-range photo showing the item in its location
If possible, include a photo of any labels, tags, serial numbers, or branding
Examples:
A close-up of a melted laptop
A medium shot of the same laptop sitting on a scorched desk
A photo of the brand logo or model number underneath
If you have receipts, appraisals, or user manuals, photograph those too.
Step 5: Photograph from Multiple Angles
Don’t rely on just one shot. Move around and capture damage from different distances and angles. This adds clarity and helps avoid disputes later.
Examples:
A roof leak photographed from both outside and inside
A broken appliance shown from the front, side, and back
Taking a short video walkthrough of each room can also be helpful.
.webp)
Step 6: Include a Time Reference
Most phones automatically timestamp photos, but for extra verification:
Take a picture of a dated document (like a newspaper or utility bill) next to the damaged item or room
Record a verbal timestamp while filming a video walkthrough
This can be helpful if you need to prove when the damage occurred.
Step 7: Organize and Upload Your Photos
Once you’ve taken your photos, store and organize them clearly. You can upload your photos directly to Loti, where we organize them by room or area of the home for easy reference. It’s a simple, effective way to stay organized and keep a clear record of your damage and belongings.
Step 8: Keep All Damaged Items Until Instructed Otherwise
Do not dispose of any damaged belongings until your insurance carrier or adjuster tells you it’s okay. Even ruined items may need to be inspected before your claim is approved.
Wrap-Up
Photographing your damage thoroughly and systematically is one of the most important things you can do after a loss. It protects your insurance claim and provides a strong foundation for recovery.
With Loti, you can safely store your photos, match them to inventory items, and build your claim with confidence. If you need help organizing your documentation or managing the insurance process, our licensed professionals are ready to assist.
Your recovery starts with clear evidence—and we’re here to make the rest easy.