Understanding the Role of Carpenters in Home Construction Projects: Framers vs. Finish Carpenters, Tools, Materials, and What to Expect

Carpenters are essential to any home construction or renovation project, bringing craftsmanship and precision to both the structural framework and the final aesthetic details of your home. This article provides a comprehensive guide to the different types of carpenters, specifically Framing and finish carpenters, the tools and materials they use, common terms you’ll hear, and what to expect when working with them.
1. Role and Responsibilities of Carpenters
Carpenters work with wood and other materials to construct, install, and repair structures and fixtures in homes. They play a vital role in both the construction phase (framing) and the finishing phase (Trim, cabinetry, etc.) of a home.

a. Framers (Rough Carpenters)
Description: Framers, also known as rough carpenters, are responsible for building the structural framework of a home, including the walls, floors, and roof. They work with large pieces of lumber, Plywood, and other materials to create the skeleton of the building.
Responsibilities:
Constructing the skeleton of the house, including walls, floors, and roof structures.
Installing subflooring, staircases, and framing for windows and doors.
Ensuring that the structure is level, square, and properly aligned according to the building plans.
Example: During the construction of a new home, framers erect the wooden framework that defines the layout of each room. They use Dimensional Lumber to build the walls, Joists, and rafters, creating the structural backbone of the house.
b. Finish Carpenters
Description: Finish carpenters focus on the finer details of a home, working on the visible aspects of the construction, such as moldings, trim, doors, windows, cabinetry, and other decorative elements. Their work is crucial for achieving a polished, aesthetically pleasing finish.
Responsibilities:
Installing baseboards, Crown Molding, door and window casings, and other trim work.
Building and installing custom cabinetry, shelves, and Built-in units.
Hanging doors, fitting hardware, and installing decorative elements like Wainscoting or paneling.
Example: In a home renovation project, finish carpenters install custom-built cabinets in the kitchen and add Crown molding to the living room, enhancing the home’s aesthetic appeal with detailed craftsmanship.
2. Tools and Equipment Used by Carpenters
Both framers and finish carpenters use a variety of specialized tools and equipment, although the specific tools they use can differ based on the tasks they perform.

a. Tools Used by Framers
Framing Hammer: A heavy-duty hammer used for driving large Nails into framing lumber. It typically has a milled face to prevent slipping and a longer handle for greater leverage.
Example: A framer uses a framing hammer to drive 16d nails into 2x4 studs when constructing the walls of a new home.
Circular Saw: A powerful saw with a rotating blade, used for cutting large pieces of lumber to length. It’s essential for making straight cuts quickly on framing materials.
Example: The framer uses a circular saw to cut plywood sheets to size for subflooring installation.
Speed Square: A triangular measuring tool used to mark straight and angled cuts on lumber. It’s essential for ensuring that cuts are accurate and that framing elements are properly aligned.
Example: Before cutting a roof Rafter, the framer uses a speed square to mark the correct angle, ensuring that the rafter will fit perfectly.
Tape Measure: A retractable measuring tool used to take precise measurements of lumber and other materials, ensuring that everything fits correctly within the structure.
Example: The framer measures the distance between studs to ensure they are spaced 16 inches apart, meeting Building Code requirements.
Nail Gun (Framing Nailer): A pneumatic or battery-powered tool that drives nails quickly and accurately into framing materials. It speeds up the process of securing large pieces of lumber.
Example: The framer uses a nail gun to rapidly secure wall studs to the top and bottom plates, speeding up the framing process.

b. Tools Used by Finish Carpenters
Finish Hammer: A lighter hammer with a smooth face used for driving small nails or finishing nails into trim and molding. It’s designed to avoid leaving marks on the finished surface.
Example: The finish carpenter uses a finish hammer to carefully nail in decorative trim around a doorway, ensuring a smooth finish without damaging the wood.
Miter Saw: A saw that can make precise angled cuts, often used for cutting trim, molding, and other finish carpentry materials. It’s essential for creating clean joints in corners.
Example: The finish carpenter uses a miter saw to cut crown molding at a perfect 45-degree angle, ensuring the pieces fit together seamlessly in the corner of the Ceiling.
Chisels: Sharp-edged tools used to carve or shape wood. Finish carpenters use chisels for detailed work, such as fitting mortise and tenon joints or creating decorative elements.
Example: The finish carpenter uses a chisel to clean out the mortise for a Door Hinge, ensuring a snug fit when the hinge is installed.
Brad Nailer: A pneumatic or battery-powered tool that drives small brad nails into wood, typically used for attaching trim and molding without leaving noticeable holes.
Example: The finish carpenter uses a brad nailer to secure baseboards to the wall, ensuring they stay in place while leaving minimal visible marks.
Router: A power tool used to hollow out or shape the edges of wood. It’s often used for decorative edging on trim or cabinetry.
Example: The finish carpenter uses a router to add a decorative edge to custom-made cabinet doors, enhancing their appearance with intricate detailing.
Sanding Block: A handheld tool with abrasive surfaces used to smooth wood surfaces and edges. It’s essential for preparing surfaces for finishing.
Example: After installing a wooden Handrail, the finish carpenter uses a sanding block to smooth out any rough spots before applying Stain or Varnish.
3. Materials Used by Carpenters
Carpenters work with a variety of materials depending on the phase of the construction project and the specific tasks they’re performing.
a. Lumber
Framers: Use dimensional lumber (e.g., 2x4s, 2x6s) for constructing the structural framework of the home, including walls, floors, and roof trusses.
Example: The framer uses 2x4 lumber to build the studs for the walls, ensuring that they are spaced and aligned according to the building plans.
Finish Carpenters: Use finer woods (e.g., oak, Maple, cherry) for trim work, cabinetry, and custom woodworking. They may also work with MDF (medium-density fiberboard) for painted trim.
Example: The finish carpenter uses oak trim around windows and doors to match the custom oak cabinetry in the kitchen, creating a cohesive and polished look.
b. Plywood and OSB (Oriented Strand Board)
Framers: Use plywood and OSB for subflooring, wall Sheathing, and Roof Decking. These materials provide a solid base for the structure.
Example: The framer installs OSB panels as wall sheathing before applying the exterior Siding, providing structural support and a base for Insulation.
Finish Carpenters: May use plywood for cabinet construction, backing for built-in units, or as a base for veneering.
Example: The finish carpenter uses high-quality plywood to construct the boxes for custom kitchen cabinets, ensuring they are sturdy and durable.
c. Trim and Molding
Finish Carpenters: Work extensively with trim and molding materials, including baseboards, crown molding, wainscoting, and chair rails, often made from wood, MDF, or PVC.
Example: The finish carpenter installs crown molding in the living room, carefully mitering the corners to create a seamless transition between the walls and ceiling.
d. Fasteners
Framers: Use large nails, Screws, and bolts to secure framing materials. Fasteners must be strong enough to hold the structure together under load.
Example: The framer uses galvanized nails to secure the roof trusses to the top plates, ensuring the roof structure is stable and secure.
Finish Carpenters: Use finishing nails, brads, wood glue, and screws for trim and cabinetry work, ensuring that fasteners are discreet or hidden.
Example: The finish carpenter uses wood glue and finishing nails to attach a decorative Chair Rail in the dining room, creating a clean, professional look.
4. Common Terms Used by Carpenters
Understanding the terminology used by carpenters can help you communicate more effectively and make informed decisions during your construction project. Here are some common terms you’ll hear:
a. Plumb
Definition: A vertical alignment that is perfectly perpendicular to the horizontal plane (level). It’s essential for ensuring that walls and structural elements are straight.
Example: The framer checks that each wall Stud is plumb using a level, ensuring that the walls will be straight and structurally sound.
b. Level
Definition: A horizontal alignment that is perfectly parallel to the earth’s surface. It’s crucial for ensuring that floors, ceilings, and other horizontal surfaces are even.
Example: The finish carpenter uses a spirit level to check that a Countertop is level before securing it in place, ensuring that it is even and stable.
c. Square
Definition: An angle of 90 degrees. It’s essential for ensuring that corners and joints are perfectly aligned.
Example: The framer uses a framing square to ensure that the corners of a wall are square, preventing any misalignment that could affect the rest of the structure.
d. Miter Joint
Definition: A joint made by cutting two pieces of material at an angle (usually 45 degrees) and fitting them together to form a corner. It’s commonly used in trim work.
Example: The finish carpenter cuts the ends of two pieces of crown molding at 45-degree angles to create a miter joint that fits seamlessly in the corner of the ceiling.
e. Toe-Nailing
Definition: A method of driving nails at an angle into a piece of wood to secure it to another piece. It’s often used when the end of a board cannot be nailed directly into the adjoining piece.
Example: The framer uses toe-nailing to secure the floor joists to the Sill Plate, ensuring they are firmly anchored to the Foundation.
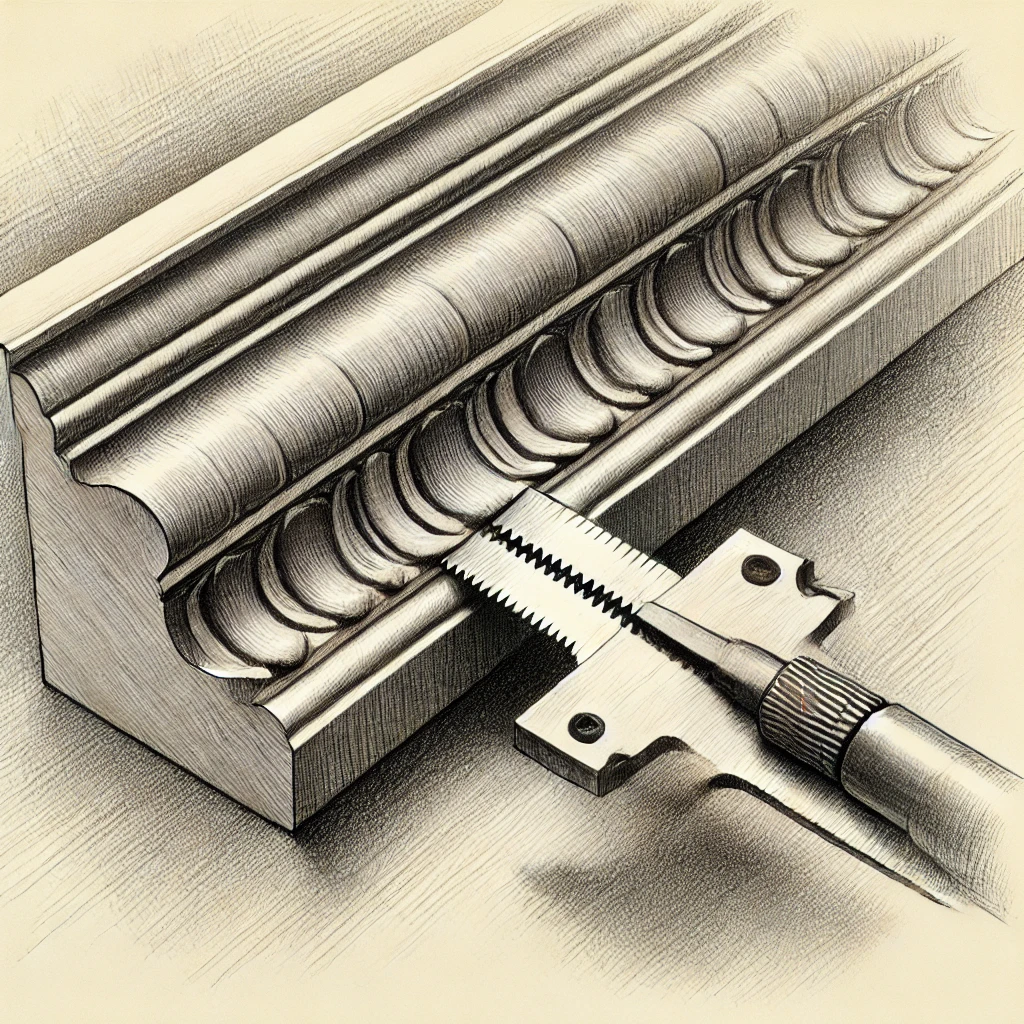
f. Coping
Definition: A technique used to join two pieces of molding at an inside corner by cutting one piece to fit the profile of the other. It’s often used in crown molding and baseboards.
Example: The finish carpenter uses a coping saw to cut the profile of one piece of Baseboard, allowing it to fit perfectly against the other piece in an inside corner.
5. What to Expect When Working with Carpenters
When you hire carpenters for your home construction project, you can expect a process that involves careful planning, precise execution, and attention to detail. Here’s what you should anticipate:
a. Initial Consultation and Planning
The process typically begins with an initial consultation where the carpenter assesses your project, discusses your preferences, and creates a plan for the work. This may involve reviewing Blueprints, selecting materials, and discussing timelines.
Example: During a home addition project, the carpenter meets with the homeowner to review the Architectural Plans, discussing the type of framing needed and the finish carpentry details, such as trim and cabinetry.
b. Framing and Structural Work
If your project involves new construction or significant structural changes, the framing work will be the first phase. The framers will build the skeletal structure of the home, ensuring that it is level, plumb, and square.
Example: During the framing of a new home, the carpenters construct the walls, roof trusses, and floor joists, creating the basic shape and structure of the building.
c. Finish Carpentry and Detail Work
Once the structural work is complete, the finish carpenters will begin the detail work. This includes installing trim, molding, doors, and custom cabinetry, focusing on the aesthetics and final appearance of the home.
Example: After the walls are up and the Drywall is finished, the finish carpenters install crown molding, baseboards, and wainscoting throughout the living areas, adding the final touches that enhance the home’s interior design.
d. Inspection and Final Touches
After the carpentry work is completed, the carpenter will inspect the work to ensure it meets quality standards and addresses any final details. This may include sanding, filling nail holes, and applying finishes.
Example: The finish carpenter fills any gaps in the crown molding with wood putty, sands the joints smooth, and applies a final coat of paint, ensuring a flawless finish.
e. Clean-Up and Walkthrough
Once the work is completed, the carpenter will clean up the work area, removing any debris or leftover materials. They will also conduct a final walkthrough with you to ensure you are satisfied with the results.
Example: After installing custom built-in bookshelves, the carpenter cleans up the dust and wood scraps, then walks the homeowner through the finished product, making sure everything meets their expectations.
6. Further Reading and Resources
For more information on working with carpenters and understanding their role in construction projects, consider visiting the following resources:
National Association of Home Builders (NAHB): NAHB Website
Carpenter’s Guild: Carpenter’s Guild Website
Fine Homebuilding - Finish Carpentry Projects: Finish Carpentry
The Woodworkers Guild of America: Woodworkers Guild
The Spruce - Home Carpentry Basics: The Spruce, Carpentry
These resources can provide additional insights and help you make informed decisions when working with carpenters on your home construction project.
Wrap-Up
Carpenters, whether framers or finish carpenters, play a critical role in both the structural integrity and the aesthetic appeal of your home. By understanding the distinctions between these two types of carpenters, the tools and materials they use, the tasks they perform, and what to expect during the process, you can ensure that your home construction or renovation project meets your expectations and enhances the value and comfort of your home.
Whether you’re building a new home, remodeling, or adding custom details, working with skilled carpenters is key to achieving a high-quality result that you’ll appreciate for years to come.